Plumbing Services

DIY Drain Cleaning – How to Get Rid of Clogged Drains

Clogged drains are more than a nuisance—they can spread germs, and foul odors and block water flow. A regular cleaning schedule for your kitchen and bathroom drains will keep them functioning correctly. Contact Philadelphia Drain Cleaning for professional assistance.Drain Cleaning

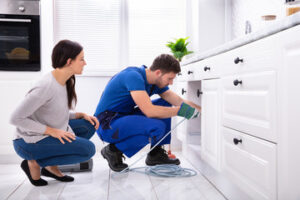
You can also try some DIY methods to clean your drains. But remember, chemical drain cleaners are corrosive and can damage your pipes.

Clogged drains are one of the most common and annoying plumbing mishaps homeowners encounter. They can affect almost every household drain, from the kitchen sink to the bathtub. They often happen at the most inconvenient times and can result in costly after-hours call-out fees. With a little know-how, however, you can keep your drains clear of obstructions without reaching for toxic chemical cleaners.

The most common cause of a clogged sink or tub is soap residue, which builds up and becomes a tangled mess over time. Other culprits include hair, cigarette butts, food scraps and other organic matter. Even small amounts of these items can result in slow drainage or complete blockage. Luckily, a few household items can help you disintegrate and wash away most drain clogs.

First, try flushing the drain with hot water. If this does not work, it is probably time to try a plunger or a wire drain snake. If the problem persists, you may need to remove the pop-up assembly and feed the wire snake into the drain while cranking it. The snake will entangle with the clog and break it up, pushing it down through the pipes.

If the plunger or snake does not work, you may need to call in a professional. This is especially true if the clog involves multiple drains or is located in the sewer line, which can cause flooding, a backup of waste and other issues throughout your home.

If you have a grease clog that just won’t budge, consider using an eco-friendly product like Bio-Clean to dissolve the fat. The natural enzymes in this nontoxic product will eat away at the blockage without damaging your pipes or the environment. You can purchase Bio-Clean at most hardware stores and it comes in a convenient pouch that you just place down the drain. It takes a while for this product to work, but it will eventually get the job done. Once your drains are free of obstructions, it’s a good idea to use it once or twice a week to avoid future problems.
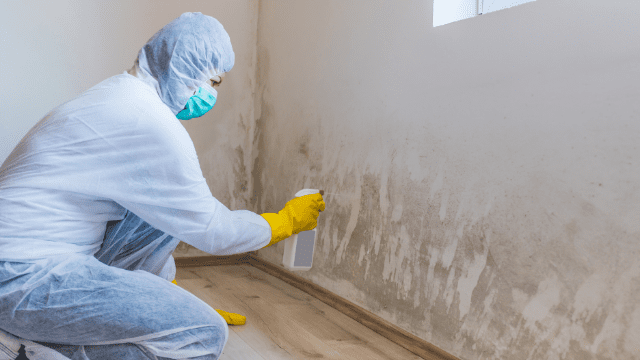
Dirty Drains

Many people are familiar with the foul odors that can be associated with a dirty drain. This unpleasant odor is caused by the build-up of bacteria and other microorganisms that are released when water can’t flow through a blocked drain. These smelly odors can cause serious health issues, including asthma, so it is important to clean your drains regularly.

A clogged drain can also provide an ideal breeding ground for pests, including spiders, ants, and mosquitoes. These pests can carry diseases and parasites that are harmful to humans, including salmonella, E coli, and Campylobacter. In addition, clogged drains can cause water or sewage to back up into your home, which can pose a serious health risk.

Dirty drains can be cleaned with a variety of chemicals, but it is best to use natural cleaning substances when possible. Begin by pouring a half-gallon of boiling water down the drain to loosen any clogs. If this doesn’t work, try using a drain cleaner that contains a strong deodorizer. After the clog is gone, flush your drain with warm water by pouring down 2 to 3 cups of near-boiling water. Repeat this process if necessary.

It is also a good idea to keep pet litter out of your drains, as it can block pipes. If you have a cat, train it to use the litter box, instead of flushing it down the toilet. If you accidentally flush pet waste, call a plumber immediately for drain cleaning to avoid an expensive clog.

Regular drain cleaning can also reduce the amount of dirt and debris that ends up in our oceans. This dirt and debris can clog and damage our sea ecosystems, which is why it is important to clean your drains regularly.

To help keep your drains clean, you should try to use less oil, soap, and grease. You should also use hot water rather than cold water when cooking or washing dishes. Hot water helps to dissolve food scraps more effectively, while cold water will rinse them away. Lastly, be sure to use a strainer when putting food scraps into the garbage disposal. This will help to catch larger pieces and prevent them from getting caught in the drain line.

Clogged Toilets

Clogged toilets are a common household problem that can be frustrating and messy to deal with. Fortunately, most of the time these problems can be resolved with a bit of non-toxic DIY cleaning. Using a plunger to break up the blockage in the drain usually works, especially when plunging is combined with a few other cleaning solutions like dish soap and vinegar or caustic soda. For more serious clogs, the best solution may be to invest in an enzyme drain cleaner or sewer snake.

A common cause of a persistent toilet clog is improper items being flushed down the drain. It is important to remind children and adults what can and cannot be flushed in the toilet, including Q-tips, cotton balls, feminine products, paper towels, and more. Keeping these items out of the toilet can prevent frequent clogs and save on expensive plumbing repairs and replacements.

When a clog in the toilet drain becomes a serious issue, a sewer snake or auger might be needed to clear the obstruction. If you decide to try clearing the clog yourself, first shut off water supply to the toilet (turn the valve on the bottom left side of the toilet tank). Next, use a plunger to create a seal over the drain opening, and then push down and up forcefully while maintaining the seal. Repeat this process a few times to dislodge the clog.

If plunging doesn’t work, a mixture of hot water and soap can help lubricate the drain and dissolve any remaining debris. Add a half cup of liquid soap to the toilet and allow it to sit for 10 minutes, then flush. You can also fill a bucket with hot bath water (boiling water could crack porcelain toilets), and pour it into the toilet drain to help loosen and dislodge any lingering clogs.

If a clog is still present, you can buy or rent an enzyme drain cleaner from most grocery, hardware, and “big box” stores. These cleaners contain bacteria that break down and eat away at the waste material in your pipes, rather than the harsh chemicals found in many commercial chemical drain cleaners. However, this option can take a while to work, and it is important to read the instructions carefully before using it.
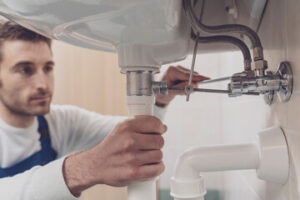
Clogged Sinks

There’s nothing quite like a clogged sink to put a damper on your everyday life. Whether you’re cooking dinner or taking a shower, it’s inconvenient and unsanitary to be left standing ankle-deep in water. So when your kitchen or bathroom drain starts to run slower than usual, it may be time for a little DIY drain cleaning. We talked to two plumbing experts—plumber Alan Soukup, owner of Bluefrog Plumbing and Drain of North Dallas, Texas, and Alicia Sokolowski, president and co-CEO of AspenClean, of Chicago, Illinois—to learn what the most common causes of clogged sinks are, as well as how to clear them on your own without the help of a plumber.

Food particles, grease, coffee grounds, hair and other debris can all end up stuck in your drains. They can also cause a complete blockage of the pipe, especially if they become lodged in your P- or J-trap (the curved pipe under your sink). To avoid these problems, be sure to keep small objects out of the drain and dispose of them properly.

If your clogged sink is caused by soap scum or grime, you can use hot water to clean the pipes and unclog your sink. However, be cautious: If your pipes are not rated for 212 degrees Fahrenheit, the boiling water could melt or deform the pipes and lead to leaks.

To try this method, first remove the stopper and any standing water from the drain. Then, fill the sink halfway with hot water, then slowly pour the rest down the drain, waiting a few seconds between each pour. Repeat as needed to dislodge the clog. If your clog is particularly stubborn, you can try using a plunger or wet/dry vacuum to loosen it. If you’re unable to break up the clog with either of these tools, you can try using a drain snake or auger, which are devices that run a metal cable through your pipe. Just be careful, as these can cause serious chemical and thermal burns if you don’t use them properly. Before you begin, ensure that the pipe is rated for the force of the tool and have eye protection and rubber gloves on hand.

Plumbing Services

The Benefits of a Tankless Water Heater

Don’t ever run out of hot water again! Denver Tankless Water Heater heats water on demand and can save energy by only using energy when needed.

These water heaters can be sized by measuring your desired temperature rise minus your groundwater temperature and the flow rate of all faucets and showerheads. These units are available in either gas or electric.

Tankless Water Heater

A Tankless Water Heater is a long-term investment in your home that saves money on energy bills and improves your home’s efficiency. However, these units are more expensive than storage tanks and require specialized installation to ensure that you get the most out of your new system.

Installation costs can add $500 to $3000 to the total cost of your project. You’ll also need to factor in the cost of piping, gas and electrical venting, as well as any needed changes to your home’s plumbing. For example, if your tankless system will replace an existing gas-powered unit, you’ll need to install new exhaust systems and gas lines. Electric models are cheaper to install than gas, but they still require a dedicated electrical outlet and may need an upgrade to your electrical panel. You’ll also need to decide between a condensing or non-condensing unit; the former offers greater energy savings by recapping and using the exhaust heat, but it’s also more expensive.

The size and capacity of your unit will also impact its price. Larger units with a higher gallon-per-minute (GPM) flow rate can support more fixtures at once, but they’re typically more expensive. For example, a small one-bedroom house can usually use a two to three GPM unit, while larger homes need units with up to 10 GPM.

Another cost to consider is the recirculation pump, which can cut down on the wait time for hot water by keeping it circulating in your pipes. This feature is particularly useful when you’re installing your tankless system in a home with longer distances between the heater and fixtures. The pump can be activated by a timer, a button, a motion sensor or a smart device.

When compared to traditional tank water heaters, a Tankless Water Heater uses much less energy. In fact, it’s one of the most energy efficient appliances in a household, saving homeowners over $50 per year in energy costs. While they cost more at the onset, this investment pays for itself with long-term savings.

The type of tankless water heater that is right for you will depend on your peak hot water demand. This is a combination of the number and flow rate of your sinks, showers, and washing machines. The best way to determine your peak hot water demand is to add up the number of people in your household, their daily activities, and the temperature rise required by each fixture (hot showers and laundry). This will give you a good idea of how much energy your house needs at its busiest times.

If your home is based on natural gas or propane, a gas tankless water heater will be more economical than an electric model, which is cheaper to purchase but not as energy efficient. However, the differences between these two models will also depend on your local fuel prices and your house’s energy efficiency.

If you’re looking for even more energy efficiency, a recirculation pump can be used to move hot water more quickly throughout your house, reducing the amount of time needed to warm it up. However, this system can become expensive if your plumbing isn’t already set up for it, or if you don’t want to spend the money on a new water heater and plumbing upgrades.

The Energy Star website states that families who switch to tankless water heaters can save hundreds of dollars a year on their energy bills. However, these savings are only realized if the unit is properly sized for your household and properly maintained. If the tankless water heater is too small, it can fail to meet your household’s hot water demands, causing an overload of demand on the system. It can also be a fire hazard if the hot water ducts are blocked and prevent the heater from venting properly.

A Tankless Water Heater can provide endless hot water as long as there is fuel or electricity to power it. This eliminates the need for a storage tank, which can be limited by its size (as you’ll discover when all your kids shower before you and use up all of the hot water!).

It takes time for a demand-type tankless water heater to heat water. This is because it only heats water on demand, as opposed to heating a constant stream of hot water from the tank. This can lead to a delay in the flow of hot water to your faucets, especially if you’re using multiple hot water appliances simultaneously.

If you’re concerned about the amount of time it takes for your Tankless Water Heater to produce enough hot water, choose a model that includes a built-in flow sensor and a modulating gas valve. These features will ensure that your Tankless Water Heater will meet your household’s hot water needs and prevent it from over-heating and causing a fire hazard. Also, a professional installation will ensure that your demand-type water heater is sized correctly for your house and meets local codes.

Power outages are a common problem for many households, and they can leave you without any hot water. While Tankless Water Heaters are known for their energy efficiency, they still need electricity to function properly. So, if you lose power during a storm or a blackout, your water heater won’t be able to operate.

The reason for this is that the gas tankless water heater needs electricity to power the fan that moves exhaust gases out of your home produced by the combustion of natural or propane gas. If you’re in an area prone to power outages, you can purchase a battery backup system that will allow your heater to operate when the power goes out.

There are also power generators that can be used to provide emergency electricity for your appliances. These units are quiet and produce a pure sine wave that doesn’t cause surges to your appliances or water heater. However, these aren’t as affordable as a tankless water heater.

For homeowners that want a solution that is both cost-effective and reliable, they should consider purchasing a gas-powered generator. These generators will provide your household with enough electricity to run your water heater, as well as other household appliances and mechanicals.

Once the power comes back on, you’ll need to reset your electric tankless water heater by pushing the breaker to the “On” position. If you notice any strange noises, or the water heater isn’t heating up your water, it may need professional attention. Contact us for a tankless water heater installation or repair in 

Unlike a traditional water heater that can be used for up to 12 years, tankless water heaters can last as long as 20 years or more. However, it is important to remember that a tankless water heater needs to be maintained and properly cared for in order to continue to function well.

One of the most important maintenance tasks for your tankless water heater is to clean its burner chamber, circulating air passages, and control compartments. This can be a dangerous task to attempt on your own because you will need to work with gas components, so it is best left to a licensed plumber.

Another critical maintenance task for your tankless water heater is to flush the system on a regular basis. This will remove mineral deposits that can build up over time and reduce efficiency or cause damage to your system. To flush your tankless water heater, shut off the water supply and power, then open the drain valve on the bottom of the unit. After the water has completely drained, connect a descaling solution to the cold water inlet valve, and follow the manufacturer’s instructions.

Lastly, it is also a good idea to periodically wipe down the exterior of your tankless water heater. This will help to keep dust and dirt from accumulating, which can also contribute to damage or reduce the function of your system. Performing these simple maintenance tasks will ensure that your tankless water heater continues to provide you with hot water for years to come.

Home Improvement

Tips for a Successful Window Replacement

Window replacement is an opportunity to improve your home’s aesthetics and boost its energy efficiency. It can be a complex project, though, and you’ll want to carefully consider your options before hiring a contractor.Window Replacement

To begin, clear a pathway to each window both indoors and out. Remove furniture, throw rugs, and breakable items from around the openings. Also, move plants or decorations located on sills and ledges. For professional help, contact Your Home Exterior Solutions now!

When homeowners are planning a window replacement, they often have many factors to consider, including energy efficiency, style and cost. A few tips for keeping your costs down include:

Purchasing windows from a reputable, high-end brand can help you save money on installation. Purchasing several windows at once can also lower the per-window cost for materials and labor. And don’t be afraid to negotiate with a contractor. Most companies expect some haggling and will factor that into their initial estimate.

The type of replacement window you choose will also affect your overall cost. A pocket replacement will cost less than a full-frame installation because it does not require removal of the old window sills and frame. A new-construction window, on the other hand, requires that all existing framing be removed and a space be created for the new window to slide into.

You should also keep in mind the amount of insulation and air-tightness your windows offer. Energy Star windows are recommended by the U.S. Environmental Protection Agency and are independently tested by the National Fenestration Rating Council to ensure that they meet high performance standards. They can be a great way to reduce energy costs and increase comfort in your home.

Replacing your windows with Energy Star-rated options can be a smart investment, but you should also invest in other ways to improve your home’s insulation and air-tightness. For example, adding attic insulation, caulking and weather stripping will significantly reduce heat loss and cold air infiltration.

Homeowners can install their own windows, but if you’re replacing an older, leaky window or dealing with significant damage or rot, it’s best to leave the installation to a professional. In addition to preventing further damage, hiring a professional can ensure your project is completed correctly and on time.

If you’re considering a DIY window replacement, be sure to research the pros and cons of each option. While it may seem like an easy project, sacrificing quality in order to save money on upfront contractor fees could ultimately cost you more in structural damage, water and energy infiltration and future repair costs.

Energy Efficiency

Window replacement is a substantial investment and homeowners should take the time to consider all of their options. In addition to aesthetic considerations, there is also the issue of energy efficiency. Old, single pane windows can allow cold air to enter the home during winter and warm air to escape in summer, leading to higher energy bills than necessary. New replacement windows offer energy-efficient features such as low-emissivity coatings, dual or triple panes and gas fills that help lower energy consumption.

In many cases, the benefits of energy efficient window replacement outweigh the increased cost of purchasing and installing a more expensive unit. But a full frame replacement isn’t always the right choice, especially for Anne Arundel County homeowners on a tight budget.

A full frame replacement is more expensive than a pocket installation because the entire existing frame and window sill must be removed in order to install a new window. A full frame replacement takes longer to complete as well, which can be a hassle for homeowners who are on a strict timeline or have limited remodeling funds.

On the other hand, a pocket installation is a much more affordable option that’s ideal for Anne Arundel County homeowners who are on a budget or have limited remodeling funds. With a pocket installation, only the existing window sash, operating hardware and covers are removed in order to insert the new window. This type of window is less invasive than a full frame replacement and can save you up to 20%-25% on your overall project cost.

While it may be tempting to replace windows when they begin showing signs of deterioration, such as sagging frames, sticking sashes or foggy glass, window repair is often a better solution. Window repair can address the problem areas in your home and prevent further damage, while restoring functionality and improving efficiency.

Style

If you’re replacing windows in your home, the type of window you choose plays a significant role in your energy efficiency, comfort and overall design. There are several window styles to consider, and each has its own advantages and disadvantages.

Choosing the right window style depends on many factors, including your budget and desired aesthetics. The most common types of replacement windows are single- and double-hung windows. These windows have lower and upper sashes that slide up and down, which allows for ample ventilation. They also allow you to use full screens and are easy to clean.

Other popular window replacement options include sliding windows, bay or bow windows, and casement windows. All of these windows have their own benefits and features, but you should choose a style that matches the style of your home. For example, if you have a historic home, it’s important to keep the original look intact, so you may want to choose a historical window type like a double-hung or an awning window.

Window frames come in a wide variety of materials and colors, so you can find the frame that best complements your home’s design. For example, if you have wood siding, you can choose windows with wood frames, while if your home has vinyl siding, you might opt for windows with aluminum or vinyl-clad frames, which are durable and low maintenance.

One thing to consider when choosing a replacement window is whether you prefer a full-frame or pocket installation. A full-frame installation is more invasive because it involves removing the existing casing and installing new jambs, sills and liners. A pocket installation is less invasive because it installs the window inside the existing frame. However, a pocket installation can lead to visibility concerns because it may reduce the amount of glass area visible.

Another factor to consider is whether you’d like a double-pane or triple-pane window. Although more expensive, double-pane windows provide better energy-efficiency and noise reduction. In addition, they’re often more visually appealing than single pane windows.

Installation

Installing new windows requires careful consideration of the frame type and operational style. A professional installer can help you choose the window that works best with your home and then install it to the specifications provided by the manufacturer. This will ensure that your new windows fit properly and function as they should. They can also help you select the appropriate type of insulation to prevent drafts and hot or cold air loss. Finally, they can add a system to shed water away from the sill and into the gutters or downspouts.

If you are replacing an existing window, your contractor will start by removing the old window. They will then clean and prep the opening for installation. This will include repairing any damage and filling any holes or cracks. Then they will install the new window and shims as needed to ensure it is level and plumb. Finally, they will seal and insulate the area around the window to protect it from the elements.

Whether you have a full-frame or pocket installation, it’s important to make sure the window is sealed properly. A poorly sealed replacement window can lead to moisture damage, mold, and rot in the surrounding wall and framing. It is also possible that it will let hot or cold air leak into your home. To avoid these problems, make sure you have your contractor use a caulking material with a low expansion rate around the frame.

A pocket installation uses a window “pocket” that fits into the existing window opening. This is much easier to do than a full-frame replacement because the window doesn’t have to be removed from the frame. This can save time and money. However, it is still important to hire a licensed contractor to perform the work because they are better equipped to deal with any unexpected issues that may arise during the process.

A full-frame replacement replaces the entire frame of the window, including the sash (moving part), muntins (grids), and trim. This can be a good choice for older homes with original frames that are in poor condition. It is also a good choice for replacements in hard-to-reach places, such as upper story bedrooms.

Cleaning Services

Mold Remediation 101

Best Mold Remediation Company is the process of removing, cleaning, sanitizing, or destroying moldy materials after a mold inspection. It also involves fixing the problem that caused the mold to prevent future growth.

Professionals wear protective suits before spraying contaminated areas with biocide, an EPA-approved liquid that kills mold spores. This step usually takes a day.

7 Mold Abatement Techniques Used by the Professionals

Mold remediation starts with assessing the extent of the damage caused by the mold. This involves taking visual inspections, odor detection, and environmental sampling. If structural problems are identified, they must be addressed. For example, the company may need to replace drywall or other building materials if there is a water leak.

Once the mold has been assessed, a containment plan is set up. This will ensure that the contamination does not spread to other areas of the property. Containment can involve simple plastic barriers or more intensive measures such as an airlock or decontamination chamber. For highly toxic molds, a special decontamination method uses fogging, UV light, or ozone.

Before the company arrives, the owner should sequester house pets in a room or outdoors, remove cars from the garage, and clear a wide path to the moldy area. This should be done a few days before the company comes to avoid disruption. The company will need to park a truck near the entrance and lay down plastic sheeting, so it is important to have a wide entry path from the driveway or garage to the moldy area.

Moldy porous building materials must be removed, such as drywall, plaster, fabric-covered furniture, and insulation. Nonporous building materials, such as treated wood and metals, can stay, but they will undergo biocide treatment to kill any remaining mold spores.

After removing porous materials, the company will thoroughly clean and disinfect all surfaces using commercial cleaning solutions and antimicrobial sprays. They will also treat the surrounding areas to prevent mold spores from growing back. Finally, they will replace the contaminated air with clean, fresh air using a HEPA filter and air exchanger.

Mold growth is a sign of moisture intrusion or accumulation. Moisture is what makes it possible for mold spores to grow and thrive in building materials such as wood, paper products, fabric, and most building construction elements. Eliminating all mold spores from indoor environments is impossible, but controlling moisture is key to preventing mold problems.

Mold remediation professionals begin the process by identifying the source of the problem. In most cases, this will require a professional inspection of the property. Once the inspector has identified the source of the problem, he will take steps to fix it. This may include repairing leaking roofs or plumbing systems, installing fans or dehumidifiers, and replacing drywall.

Once the source of the moisture has been eliminated, the next step is to remove the mold. This can be a lengthy process, depending on the home’s size and the extent of the mold infestation.

The fungi commonly removed from homes during this process include Stachybotrys chartarum (black mold) and Aspergillus flavus (aspergillus). Both of these species are toxic to humans and can cause serious health effects.

During the removal process, mold professionals will use fans and dehumidifiers to dry out affected areas and remove any material that is too damaged to salvage. Once the contaminated materials have been removed, professionals will clean and disinfect all hard surfaces using antifungal cleaners. They will also use air scrubbers to control the spread of spores.

Mold spores are microscopic and float in the air, so they can easily enter your home from windows, doors, or AC/heating systems. They can also hitch a ride on your clothing or your pets’ fur. Mold spores can quickly turn into colonies that produce allergens and irritants, and they can also cause damage to building materials such as drywall.

Mold can be found on various surfaces, including wood, paper, fabrics, and building materials. Most of these materials can be cleaned by following the instructions on the cleaning product. Nonporous materials affected by mold can generally be cleaned by removing the mold and then drying the surface. Porous materials that are contaminated by mold can be cleaned by scrubbing, washing, or sanding them, depending on the material type and the contamination’s severity. Porous materials with a high moisture content or those with a large number of mold spores may need to be replaced.

Mold spores harm humans, especially those with respiratory conditions such as asthma. They also aggravate allergies, leading to various symptoms, from itchy throats to coughing and wheezing. Remediation specialists focus on providing a clean and healthy atmosphere for the residents of a home.

They first isolate the moldy area by sealing all windows, doorways, and other openings to keep the spores from spreading to the unaffected areas of the house. This can take several days.

Once the contaminated area is contained, the team begins the cleanup and restoration process. They remove all the visible mold from the affected surfaces and then use HEPA-approved vacuums to clean up all the debris, dirt, spores, and other contaminants left behind.

They use disinfectants to treat all surfaces that are not being replaced and disinfect any items in the affected room, such as carpets and personal belongings. This step also includes sanding or washing all of the wood surfaces in the room that have been exposed to mold and then staining or painting them.

The mold remediation company will also dispose of infested materials during the cleaning and disinfecting phase. Porous materials such as drywall, cardboard, insulation, carpet, and drapes must be discarded since they can’t be cleaned effectively. They will be sealed in impermeable plastic bags and disposed of outside the building. The outside of the bags will be wiped down with a damp cloth and detergent solution before they are transported to uncontaminated areas of the building for disposal.

Nonporous materials like wood and metal can be cleaned by wiping and scrubbing with water or cleaning chemicals as long as they are dry. Follow the instructions on product labels for safe usage. It is impossible to completely remove all mold from living spaces because it exists everywhere, indoors and outdoors, as microscopic spores that float in the air and may enter your home through windows, doors, or HVAC systems—or hitch a ride inside on your clothing or pet. But you can control the amount of mold in your home by finding and repairing any sources of moisture.

The mold remediation team will isolate the area and use a negative-pressure decontamination chamber if the contamination is extensive. If the contaminated areas are small, it may be possible to contain them with air conditioning vents and dehumidifiers. In any case, the mold remediation team will follow Department of Health guidelines for determining containment levels based on a range of factors, including the size and location of the contaminated area. The remediation team will also address any factors contributing to the contamination, such as correcting humidity levels and repairing leaks. After the cleanup and disinfection, an environmental testing company will perform a visual inspection, odor detection, and environmental sampling to determine if the contaminated area has been returned to a normal fungal ecology level.

Mold remediation is a vital service and a great way to keep your home safe. However, it is important to understand how the process works to stay safe and ensure the company is genuine.

Before starting the cleanup process, a professional will inspect the affected area. This will include looking for areas with elevated moisture levels. These can be the symptoms of water damage and should be addressed immediately. Mold can grow anywhere moist, but it usually appears in bathrooms, basements, and sink cabinets due to condensation.

If the area has no visible mold but a high humidity level, an antimicrobial can be applied to prevent mold growth until the water problem has been resolved. If there is a visible mold colony, the area will be scrubbed and lightly sanitized using bleach or another EPA-approved cleaner.

After cleaning, the surface can be encapsulated with acrylic paint or whitewash. This will keep mold spores from growing again and make the surface more attractive. If the area has been contaminated with a toxin, such as black mold (Stachybotrys chartrum), a biocide must be used to kill the organism and prevent it from re-growing.

Any porous materials damaged by the mold are disposed of, such as cardboard, insulation, carpeting, and fabric-covered furniture. Nonporous items, such as wood and ceramic tile, can remain. Any items that can be salvaged are cleaned, and any mold spores stirred up during the process are killed using an EPA-approved biocide. During this step, personal protective equipment is also worn to protect against respiratory exposure.

Plumbing Services

What Is Residential Plumbing?

Residential plumbing involves the pipes that bring water into and out of homes. It includes fixtures like sinks, toilets, and showers. It also handles wastewater from these fixtures and sends it to a sewage system or septic tank.

There are many different residential plumbing techniques that plumbers can use. Some are traditional, and some are innovative. Click https://www.plumberscranton.com/ to learn more.

residential plumbing

Water supply pipes bring fresh drinking water into a house, carrying wastewater away. They are often made of copper or plastic tubing that connects to fixtures such as toilets, showers and faucets. You will also find these pipes running underneath your floors. The most common material for these pipes is polyvinyl chloride, or PVC. Another popular option is cross-linked polyethylene, or PEX. These modern piping materials have become popular with homeowners and professional plumbers because of their durability, flexibility and easy installation.

The water supply pipe system in a home typically begins with the city water mains, which carry clean, pressurized water into your property. Then, the pipes run from the water meter into the water distribution systems inside your home. The main shut-off valve is usually located close to the meter to stop the flow of water in the event of an emergency. Make sure that every family member knows where this valve is and how to operate it.

Once the water is inside your house, it travels through the hot and cold water supply lines to each fixture. These pipes are primarily installed in straight lines so that the water moves easily from one area to another without resistance. The more bends that are introduced into the line, the less efficiently the water will move.

These supply pipes can be made from a variety of materials. Ductile iron, galvanized steel, and CPVC are some of the most durable, but they are costly and difficult to install. Copper, on the other hand, has a lightweight portability and offers great thermal conductivity. It is a good choice for the distribution systems in a new construction home or for repiping projects in older houses.

The most recent piping material is called PEX, which stands for cross-linked polyethylene. It has gained popularity over the past few decades due to its durability and ease of installation. It is commonly used in homes for hot and cold water distribution, to cycle reclaimed water, and for hydronic piping such as radiators. However, it is important to consult with a professional plumber to ensure that the PEX meets local plumbing codes.

In a residential setting, water supply pipes are responsible for transporting potable drinking water to the home’s plumbing fixtures. The system is composed of a network of pipe lines that carry cold and hot water to bathrooms, kitchens, toilets, washing machines, and other appliances. A residential plumber can assist with determining the best water supply piping options for your home’s needs.

The piping that transports water from your city or town’s public water supply line into your home is called the water distribution pipe, which connects to the public main and then branches into a household water supply system. This system then distributes the water to individual faucets and other plumbing fixtures throughout your home.

Once your home’s water supply reaches the plumbing fixtures in your house, the water is distributed through a series of cold and hot water lines that are each controlled by their own set of valves and faucets. The most common of these valves and faucets are ball valves, which are simple to install and use, but have a tendency to leak over time. More advanced faucets, like those used in showers, can be fitted with water-saving sensors to monitor flow rates and detect leaks when they occur.

Before a new domestic water piping system is installed, its piping layout must be established and the volumetric flow rate for each of the plumbing fixtures in the home must be known. This information is required in order to determine the amount of water supply fixture units (WSFU) each piping type can feed. The WSFU value for each plumbing fixture is established by the governing plumbing code. In addition, the piping design must also take into account the available main pressure for the project site as well as the projected velocity of the water at the most hydraulically remote fixture.

Water supply pipes are typically made from copper, steel, ductile iron, polyvinyl chloride (PVC), and chlorinated plastic (CPVC). Builders will often consider these materials based on the availability, cost, and acceptability of each at the time of construction. Over the past three decades, cross-linked polyethylene (PEX) has become a popular choice among professionals and DIYers because it offers more flexibility than traditional copper pipes, reducing installation labor and potential leaks.

Your home’s plumbing system isn’t complete without its drain lines. These carry waste, including sewage and toilet contents, away from each fixture like sinks, bathtubs, and showers. Each drain line starts at a plumbing fixture and runs to a main drain line that carries its waste to a municipal sewer line or septic tank on your property.

While your home’s drainage system relies on gravity to move water and waste, it also uses air pressure to help wastewater flow smoothly down drain lines. Vent pipes, which have capped openings, attach to each drain line and extend out through the roof.

Each drain line in your home has a trap that’s filled with water to prevent air and gas from passing up the line while draining down. This helps your home avoid odors, keeps your drains working properly, and helps keep the plumbing systems in each room of the house separate from one another.

Most of the drain pipes in a residential setting today are made of copper or the plastics polyvinyl chloride (PVC) and acrylonitrile butadiene styrene (ABS). They’re usually red for hot-water lines and blue for cold-water lines. Homeowners also may find older drain/waste/vent (DWV) pipe materials in some pre-1960 homes, including galvanized steel and cast iron.

In addition to considering the type of pipe material that’s best for your home, you should take into account the soil conditions where the pipes are installed. Exceptionally rocky or sandy soil may require the use of a thicker, more durable pipe like cast iron or concrete.

The diameter of a drain pipe also influences its ability to transport water and waste at a given rate. Larger diameter pipes can handle high volumes of water and waste, while smaller pipe sizes can cause clogs or slow drainage in some situations.

Other considerations for choosing a drain pipe include its installation costs, maintenance requirements, and warranty specifications. A plumber can assist you in finding the right pipe for your home that meets local regulations and offers a good value for its expected useful life. Getting this information upfront will help you make an informed decision when installing or replacing your home’s drain pipes.

The plumbing drain pipes in your home connect to a horizontal drain pipe called the soil stack that transports wastewater out of your house. Your toilets, bathtubs, showers, sinks and laundry machines send their waste to this pipe. All this waste combines into a sewer line that travels under the foundation of your home to a main sewer line, which in turn connects to your public or municipal sewer system.

A clogged home sewer line can have serious consequences for your family and home. If it goes unrepaired, sewage can back up into your home’s plumbing fixtures and cause serious damage. Fortunately, this problem is relatively easy to diagnose. The simplest way to check your home’s main sewer line is by watching where water and sewage exit through the lowest part of your bathroom. If it exits through a toilet, tub or stand-up shower, you likely have a main line sewer problem.

Your home’s main sewer line is typically four to six inches in diameter, and it slopes downward to promote the flow of debris and waste away from your house and into your city’s sewer system. It also runs through your yard, so it’s important to maintain its condition.

Most residential sewer lines are made of cast iron, galvanized steel, PVC plastic or ABS plastic. Some older homes have Orangeburg pipe, which was a common choice for house sewer lines until the mid-1860s. Unfortunately, these pipes are prone to deterioration and corrosion, which can lead to blockages that require costly repair or replacement.

The most common cause of a clogged sewer line is when people flush non-flushable items down the toilet. Children are notorious for tossing toys and clothes down the toilet, but these objects can quickly clog your home’s drains. Other causes of clogged sewer lines include tree roots and grease.

A good way to prevent problems with your home’s sewer line is to regularly weed and mulch your yard, which will help keep tree roots from entering and damaging the pipe. You should also avoid using corrosive household drain-cleaning products, as they can erode and eat through the pipe.